About Me

I'm a teacher turned stay at home mama. I love finding things to make and do!

Followers

Showing posts with label art. Show all posts

Wednesday, October 9, 2013

Free Art

When I taught kindergarten, the most popular free play area in my room was the art area. Kids would spend their entire free play time constructing impressive projects with simple tools.  I've been wanting to give A the same opportunity, so the other week I set out some art/craft tools to see what would happen.  

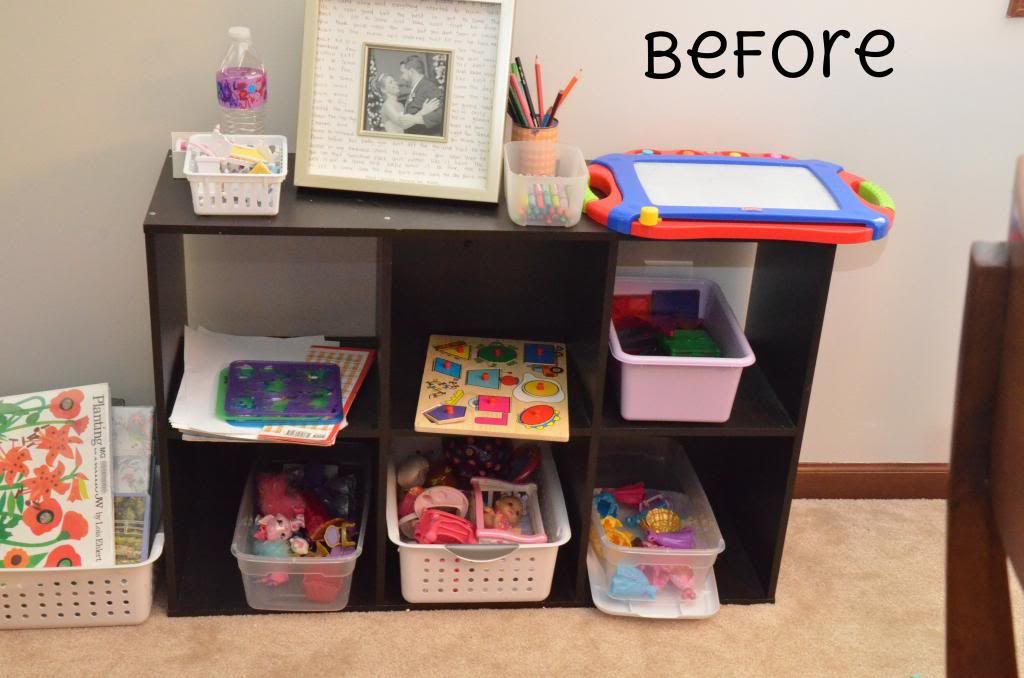
This is the before picture of our toy shelf in our main living area (note the lovely wedding photo of Mama and Daddy :)):
This is our after picture!
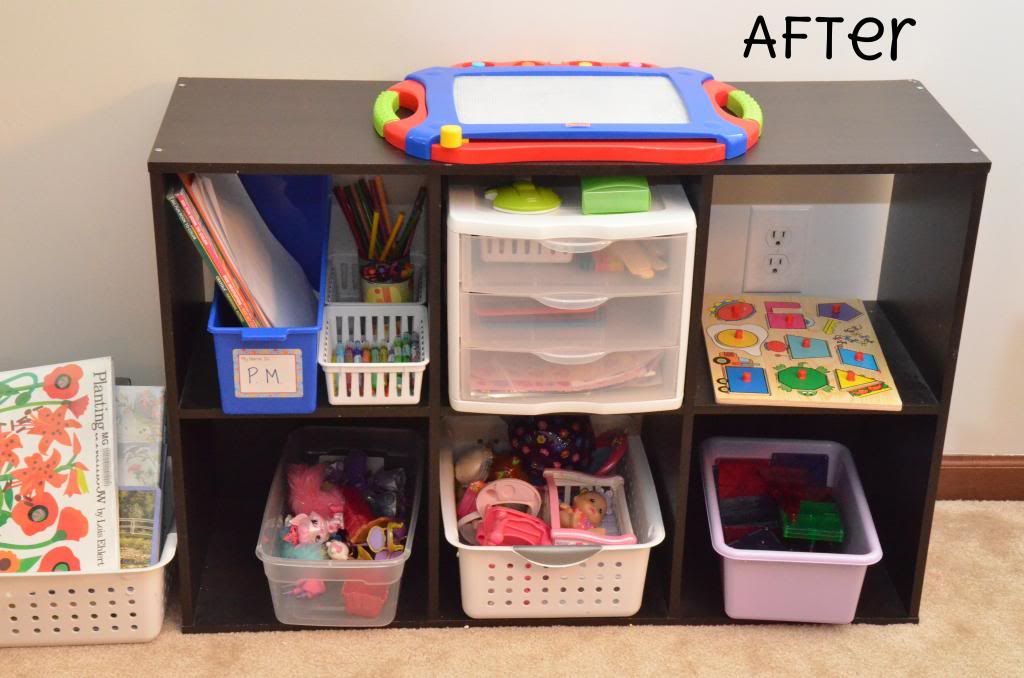
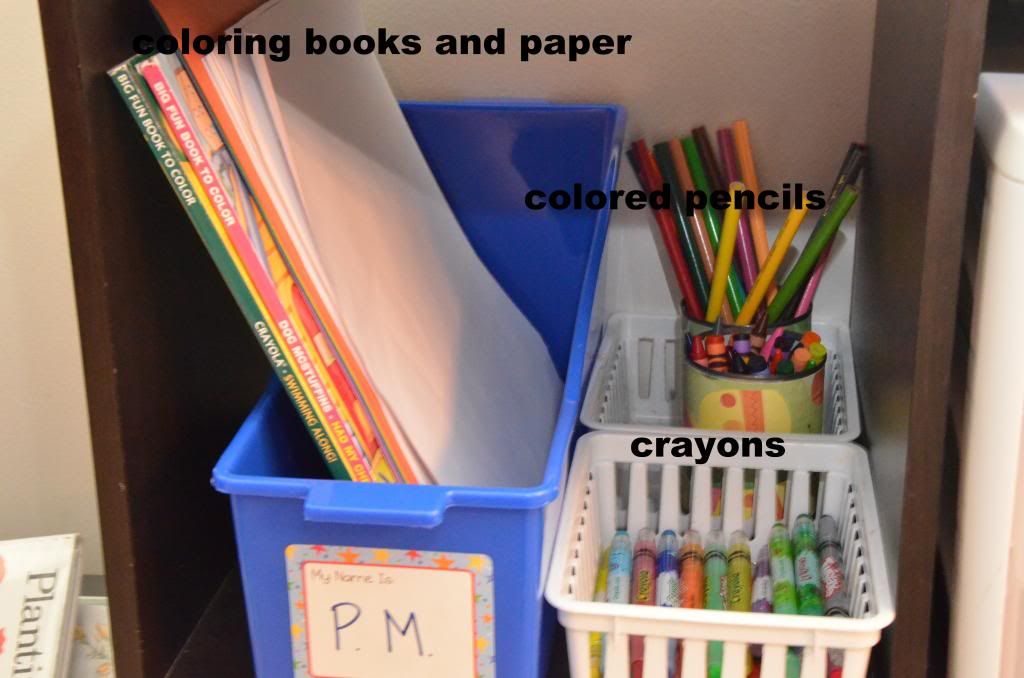
I placed a magazine holder with coloring books and different types of paper in the first cube.  (Disregard the whole, "my name is P.M." thing.  This is from my afternoon K class and I never peeled the sticker off!) I also added colored pencils and two types of crayons for easy access.
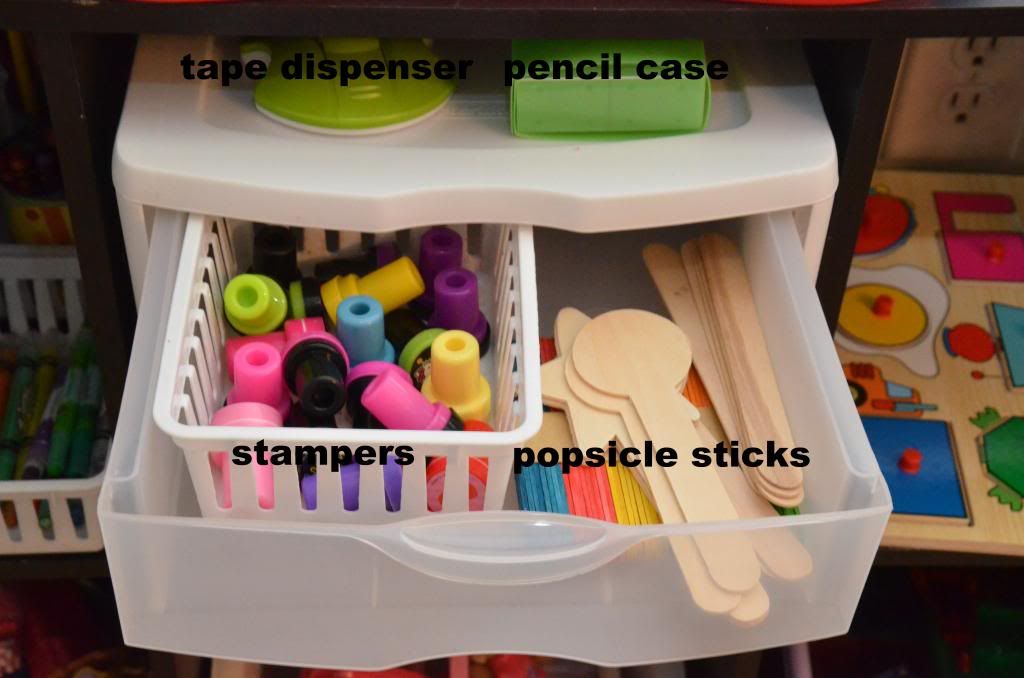
In the second cube, I put a drawer organizer. You can see a tape dispenser and pencil case on top.  The pencil case has a pencil, glue stick and scissors in it (easy for my 4 year-old to get to, but not for my 2 year-old)
The first drawer has popsicle sticks and stampers
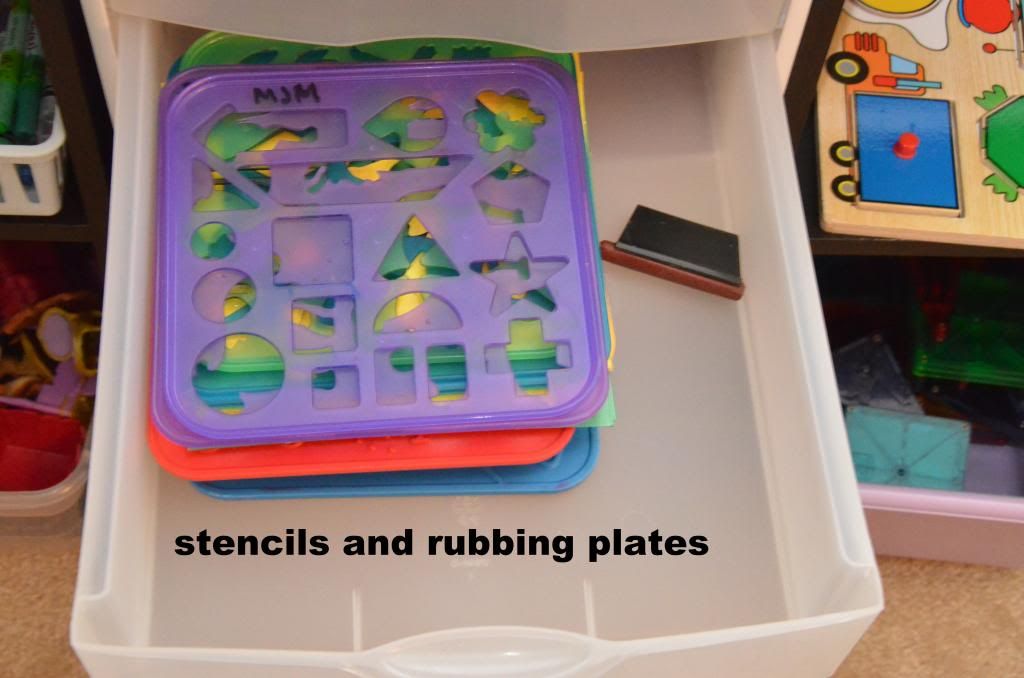
The second drawer has stencils and rubbing plates
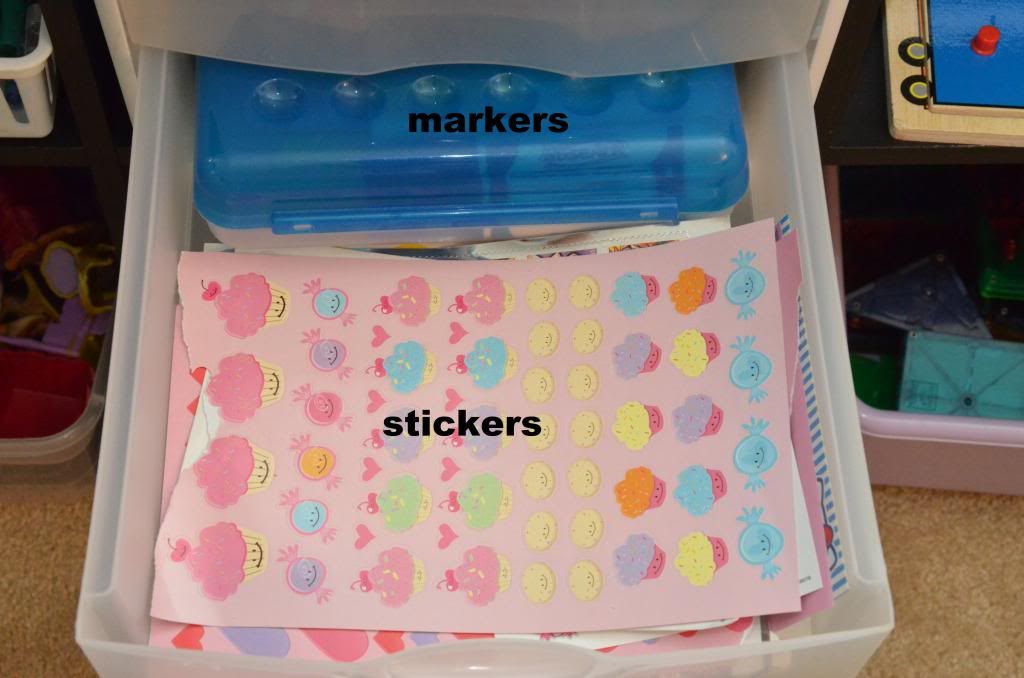
The third drawer has stickers and a pencil box with markers. I wanted A to have the option to use markers without having them out in the open where little sis could get to them.
This has worked so well, and A has made some really great drawings and popsicle stick creations.  I've since added a bunch of supplies to this shelf and I'll be updating with another post soon.

Monday, May 21, 2012

Animal stamps

I found these My First Crayola Stampers
at the store a few weeks ago and thought I'd give them a try.  They are self-inking stampers, so there is no mess with additional ink pads.  I did think the actual image would be a bit larger, considering the size of the animals.  We first tried them on a blank sheet of paper, but A wanted a bit more direction.  I folded a piece of paper and then traced on the folds to make a grid.  A then placed a stamp in each square.  When this page was filled, she asked for a new one!  These are pretty cute and a nice little addition to our art stash. 

Thursday, March 8, 2012

Make a Face


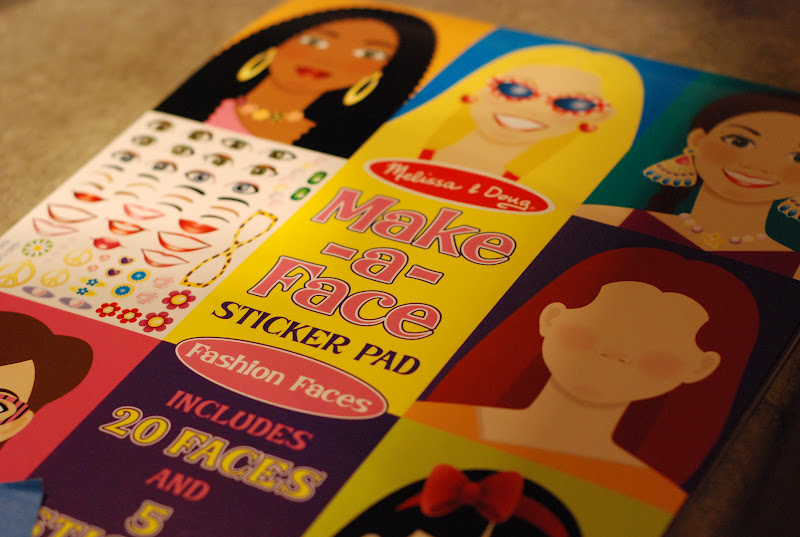
A loves stickers.  I found this Make a Face sticker pad on Amazon for 4.99.  It was a huge hit!  I've been limiting her to 3 per day, otherwise she would have used up the entire pad at once!  (Too bad they don't make a "boys" version.) 

Tuesday, March 6, 2012

We are still here.

Oh how these past few months have flown by...sort of.  They have been busy, full of holidays and birthdays and then just the everyday little things.  I take photos of what we do, I just don't take the time to upload any.  Hopefully I'll get better about that.
This morning we are at the dining room table...coloring.  A has never really been interested in coloring, and out of the blue--yesterday, she wanted to color.  She colored Care Bears and Dora and Curious George...anything we could find online and print for her.  This morning she discovered her brand new box of crayons Mama bought for her...64 of them!  I am sitting beside her as she shows me each crayon and asks me the name of the color: Purple Mountain's Majesty, Macaroni and Cheese, Mauevelous!  I love a brand new box of crayons.  Speaking of crayons, do you remember this clip from Sesame Street?  One of my favorites. 

Thursday, November 17, 2011

Homemade sticker pages

A is LOVING stickers and sticker books right now.  I have a bunch of foam stickers laying around, and we are usually just making foam sticker collages.  Today, I decided to trace around the stickers and have A match the stickers to the outlines.


I think we'll be doing this all day long.  The nice thing about this is that she has to do a series of steps:

-peel off the back
-put the peeled paper in a trash pile
-find the matching shape
-place the sticker in the correct spot

I don't know what we'll be doing with dozens of sticker pages around here, but it's all about the process, not the product.  We'll hang them up all over for a while since she's so proud of her work!

I also plan to make pattern strips  where she not only has to match the stickers, but then continue the pattern with no outline to help her (I'll post that when we do it!), as well as cards where she sees what is on the top and she needs to duplicate it on the bottom (we can cut them and turn them into memory cards)

Monday, September 12, 2011

Apple and Celery Prints

Yesterday while I was cutting up some celery, I was reminded of a project we did in my kindergarten class for Mother's Day.  We took the bottom of the celery stalk, and made rose prints with it.  I asked A if she would like to try.


After our celery prints, I cut an apple in half (horizontally) and A made star prints with the apple.  I know there is a story/book that goes along with finding a star inside of an apple, but can't remember the title.

This was a really quick art project and A had fun making flowers and stars.  She enjoyed showing her prints off and telling others how she had made them!

Wednesday, September 7, 2011

Using what you've got

A hadn't painted in a while, so I thought I'd get out the paints and let her enjoy them.  I couldn't find my painter's palette, but did see an empty egg carton in our craft supplies.  I decided to use part of one to hold the paints and it was perfect!


Wednesday, August 31, 2011

Simple Art

On this day, I really needed to get some pots and pans cleaned and A really wanted to be by Mama.  I decided to find her a little project to do near me.
Our simple art project included the Crayola Color Explosion paper/markers and a sheet of colorful reinforcement labels.

It took just the right amount of time and turned out very colorful!


Friday, August 26, 2011

Tools from a Kindergarten Teacher's Classroom

Here is a list of items I've used in my classroom after having tried and testing different brands/styles.  I haven't tried ALL other brands, but most of the brands that you'll find in the Big Box stores.

Crayons:
(photo from Amazon.com)

CRAYOLA, hands down.  These give the best non-waxy color of the most recognized brands in the stores.  I do NOT like the Jumbo crayons (my school had all kindergarteners purchase those).  They dull quickly and it's hard even for an adult to color inside the lines with them!  The Large size are MUCH better.

(photo from Amazon.com)

CRAYOLA.  I have tried other brands, and unless you want to purchase real colored pencils that artists use, Crayola will be your best bet.  They stay sharpened longer and the pencil "lead" doesn't break and fall off in pieces on you.  I have also tried the Jumbo Colored Pencils from Lakeshore Learning and those have held up pretty good the few times we've used them.


Markers:
It doesn't matter.  As long as they are washable, I've found that most brands in the stores that look like Crayola markers compare just fine with them.

Pencils:
(photo from Amazon.com)

TICONDEROGA.  I like the hard lead and they stay sharp longer than other brands.  For tots, I like the Ticonderoga "Laddie tri-write."  It's thicker than a regular pencil and has a slight triangular shape that little ones can grasp.

(photo from LakeshoreLearning.com)

I like using construction paper when we do any type of painting or drawing.  It has a bit of a texture, which will soak up any paint/markers better than just plain old computer paper.  We get ours from Lakeshore Learning because it is such a great deal!

Paint:
I'm not picky.  I will say that for beginning painters, I would not recommend the Crayola Beginnings All-In-One paint.  It's made for little hands to grasp, but the brush is so tiny, it's hard for toddlers to get it on the paper the way they want it.  If you're going to use an all-in-one painbrush, I'd go for the Crayola  Triangular Paintbrushes.  These are messy, so you may just want to go for plain old paint and a paintbrush!


(photo from Amazon.com)

Yes, brand DOES matter.  I use Scotch.  It has the best amount of stick without leaving a residue.  Other brands just haven't had the best "stick" to them (which is fine, since in a normal setting you wouldn't want it to stick a whole lot).


(photo from Amazon.com)

I like the Elmer's glue sticks, but NOT the purple ones that dry clear.  Little ones tend to end up with chunks of the glue stick depending on the project and when there is more than just a thin layer of the glue, it will dry purple rather than clear.


(photo from Amazon.com)
Plain old Elmer's white school glue...not the gel.  Just the right thickness.

I think that's it.  Did I forget anything?


*These are my personal opinions on the best products I've found.  I am in no way affiliated with the brands or websites listed.  I just really enjoy their products!

Wednesday, August 24, 2011

Art playdate

 We hosted an art playdate for our friends and it was a hit!  I pulled out a bunch of our art materials, along with some art trays purchased here, handed out smocks from IKEA (LOVE these!) and let them go to work!


I'm looking forward to more art playdates in the future!

Friday, July 15, 2011

More flowers!

Every now and then I purchase one of these wooden coloring pieces from JoAnn fabrics for a dollar.  It's an easy project and is something just a little different from coloring on paper.

A wanted Muno to watch her color...

The wooden pieces often times come with four tiny markers to use.  This one didn't, but we used our own.  Putting the caps on make for great fine motor practice.

Now we have two beautiful bouquets!


Photobucket


Tuesday, July 12, 2011

Beautiful bouquet


I finally pulled out some old tot school things for A to do again.  In one of the bins was an old reproducible page from a Bible lesson we'd done a while back.
A used do-a-dots to color the flowers, I cut them out and she helped me tape them to straws.  When she saw what they made, she wanted, "more flowers!"  I took one of her many many pieces of artwork she'd done and cut out more flowers.  We taped those to the back of straws, arranged the flowers and sang the "I Obey" song from the Bible lesson.  Super easy craft and A really enjoyed herself.  She even sniffs the flowers!

Monday, July 11, 2011

Art shelf

About a week or so ago, I decided to try and keep art supplies out for A so she could use them whenever she chose to.  I made sure to have a piece of paper taped down (with painter's tape) to her small table as well as one on the easel.  She's been doing a great job!
The containers are just mini-cans of veggies covered with scrapbook paper.  I had the white base from a candle display.  We've had a lot more masterpieces around here lately, and I no longer have to get markers or crayons out when A feels like using them.

Wednesday, July 6, 2011

Free Activity Calendar

(banner from QuirkyMomma.com)

We have been traveling and enjoying time with family over the holiday weekend.  We are just getting back into the swing of things.  Visit Quirky Momma for her July activity calendar.  It's a printable calendar with simple activities you can do every day with your kids.  It's such a great tool.  I love it!

Friday, July 1, 2011

Fourth of July: U.S.A. Flag!

A and I made a flag using construction paper and contact paper.  Here are the materials I had ready before we began:
-2 plain white pieces of paper
-two blue rectangles cut from construction paper
-red strips of paper cut from construction paper
-white stars cut from toddler to toddler
-a piece of contact paper cut a bit larger than the white piece of paper
-blue painter's tape

First, I put glue on the stars and A stuck them to her blue rectangle.


Next, I had the contact paper taped (sticky side up) with a white piece of paper underneath.  I had my white piece of paper so she could see where to place the blue rectangle. She placed her blue rectangle on her contact paper.  (It was totally in the wrong spot, but I left it)

*When doing this, you must do it in reverse (mirror image), since you are going to be flipping it at the end of the project.


I showed her how to put the strips of red paper on and let her do her own.


When she was finished, I pulled the white paper from beneath the contact paper and placed it on top.  I folded the contact paper over and it stuck to the back of the paper.  I even used a bit of tape to make sure it really held well.


The final product!  It may not look "right" but it's more about the process than the final product.  :)


Linking up here:


Photobucket


Thursday, June 30, 2011

Fourth of July: Fireworks!

This is the first time A has tried marble painting.  I figured she would enjoy it, since she really enjoys playing with her Marble Works. 
First she helped me put dabs of paint and glitter glue onto the black construction paper.
Next, she tossed in two marbles.


She tipped the bin back and forth and then shook it really good.
After the paint dried a little, I gave her some red and blue foam star stickers to stick on the paper.

I love how festive it looks!  Our art clothesline is full of red white and blue this week!

Linking up here: