About Me

I'm a teacher turned stay at home mama. I love finding things to make and do!

Followers

Friday, June 10, 2011

Instant art station/placemat

So you know how in some restaurants, usually Italian, they put white paper down for tablecloths and give you crayons to doodle with?  Um....why haven't I been doing this for A for longer?

I've talked about how A is a grazer and isn't much for eating meals at her seat.  She'd rather eat on the run or stand in her Learning Tower.

One thing she does like to do at her seat is to color.  As I was setting the table for supper the other day, I was about to move her paper from earlier and I thought, "Why?  Just leave it...then when she's bored from eating, she can still sit with the family and enjoy being with us."

So I did it.  And you know what?  She's eating a little more and sitting a little longer each time. 

The paper is from a giant pad of paper I got from Target.  Put that down using a few pieces of blue painter's tape (LOVE that stuff!) and you've got a nice placemat/instant art time!

*I'll probably cut pieces from this giant piece of paper (maybe into different shapes) and send the art to family and friends.  However, if I don't, I'll just flip the paper over and use the other side.

Thursday, June 9, 2011

Summer Fun

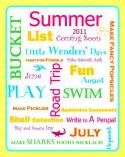
This spring, I started making a summer fun list.  This week, I came across two blogs that posted theirs, along with a blog that has a summer bucket list linky party!  So many ideas!  I'll be linking up with them. 
 

-swimming pond
-splash pad
-pick strawberries
-farmer's market
-go to Illinois
-go to Wisconsin
-zoo
-make pickles
-make dilly beans
-freeze fruit
-can fruits and veggies
-visit hospital
-play at Auntie's house
-play dates
-summer tot school
-parks
-sponge paint
-watch a plant grow
-sprinkler
-get sister's room ready
-bake
-bonfire with Dziadzia
-art
-practice swimming
-send art to family and friends
-help Mama sew
-picnic
-handprint craft
-make cornbread
-State Fair
-bubble wrap painting
-water balloons
-outside concert
-aquarium
-2011 summer journal/photo album
-library
-art playdates
-play with squirt bottles outside
-go on a walk with Daddy
-trolley ride
-visit Daddy at work
--make BIG bubbles
-read books outside
-try new fruit popsicle recipes
-build a fort and play with a flashlight
-Tale time
-play in the tent outside
-baseball game

Mama's list
-make freezer meals
-make Hawaii photo album (and photo book for A)
-continue to print photos as deals come up
-date night's with Daddy (even if it's just dinner on the patio or a dvd)
-purge and organize
-get my camera lens fixed
-sewing projects
-work on my photography
Visit these blogs for more ideas:
Playing House in Maryland

Alphabet Summer (way cool, we'll be doing this next summer)

Summer Bucket List

Linking up here:

Photobucket

Wednesday, June 8, 2011

Good for you cookies

We've had the stomach bug around here and it has not been fun.  Thankfully, A's Daddy (my hero) was able to work from home so I could rest and get better.  Now all we need is for sweet girl to gid rid of her "owie tummy."

My friend Rebecca made these delicious cookies and brought them to our last playdate.  No eggs, no milk, no butter.  They were soooo yummy!  They yasted like granola...and I heart yummy granola.  I told another friend about them, who promptly made a batch and ate "too many" (as if that's possible.)

Please don't take my word for it.  Go here to see photos and the original post.  The cookies are even yummier than they look!  (p.s. you can substitute whole wheat flour--or probably even all-purpose flour in place of the barley flour)

Lalo's Famous Cookies
From My Father's Daughter, by Gwyneth Paltrow
Ingredients:
4 cups barley flour
3 cups raw whole almonds crushed in a food processor (about ten 2-second pulses)
1 teaspoon fine salt
1 teaspoon ground cinnamon
1 cup canola oil
1 cup real Vermont maple syrup
Your favorite jam (I used strawberry) 

Directions:
Preheat the oven to 350 degrees.

Combine all ingredients except for jam together in a large bowl with a wooden spoon. Form into tablespoonful balls and space them evenly on cookie sheets. Using your index finger, make an indent in each cookie. Fill each indent with a small spoonful of jam. Bake until cookies are evenly browned, about 20 minutes. Let cool before eating.

Monday, June 6, 2011

Sponge Balls!

We are going to stick with our tot school boxes from last week.  We only used them twice.  Between the weather being beautiful and A having an ear infection, they didn't get much use.

I'm actually thinking about scaling way back on the tot school for the summer. I always had the thought in the back of my head, but now I know we'll just spend tons of time outside this summer and that's just fine with me!  I will still put a few activities in her school bins as she regularly goes over to them and says, "school!"  They'll just be made up of things I already have made and are quick to throw together.

This week I hosted a playdate with a craft for the mamas to make.  We made sponge balls from Family Fun magazine.  Of course I didn't take any pictures of everyone making them, but here is a photo of the sponge balls being used:


 you can go here for instructions how to make your own.  They are super easy to make and A enjoys using them both in and out of the water!

Friday, June 3, 2011

Rotating Toys Part Three: Rotating the toys

How often do you rotate toys? 
My answer is that when I notice that A is no longer taking the toys off of her shelf and playing with them, it's time to switch.  This is usually every two weeks.  I do the rotating on a Saturday, when Daddy is home and can help wrangle A.  She's very excited when she sees a new bin come out of her closet. 

There are three areas where the toys from the bin are distributed.  The bookshelf in her room is one area.
The two spots on the right of the top shelf stay the same, and the book bins on the bottom stay there too (rotating books is for another post!)
In this photo, the toys from her bin are located on the top left shelf and the bin on the right of the middle shelf.  The little doll house is one of the "big" toys from her closet that didn't fit into a bin.  I also had one more toy from the bin sitting beside her bookshelf.  I usually put out one or two "big toys" each time I rotate a bin.

The second area is A's toy shelf in the living room.  This shelf has six spots.  One spot is always reserved for library books and I usually have one of the toys on the top shelf.  So, five or six toys go on this shelf.

The third area where the toys from the bin go is A's toy box in the living room.  We have a footrest that opens up and it is dedicated to housing balls, a few toys from the bin and just random things A brings into the living room.  The toy box starts out looking like this:


..and ends up looking like this.  A always grabs something from her room when she wakes up in the morning or from a nap and brings it downstairs.  She also brings toys in from outside and when she's just had a bath.  These toys are all placed in the toy box.  When I switch bins, I put all of these random toys back where they belong, put a couple in from the bin, and always leave the balls, an elmo and a few figurines.

One last place that houses A's toys that never get rotated is the bottom dresser drawer in her bedroom.  Like the toy box in the living room, A has this drawer all of her own where she can open and close it at will and play with the toys whenever she wants.  Although I love the idea of each toy having its place, I do believe children love to rummage through things sometimes and I wanted A to have the freedom to do so.  The toys in this drawer are just little random toys like rattles, figurines, small balls, small plush toys, maracas, etc.  I do make sure that there are no choking hazards placed in this drawer or in her bedroom since I walk in and out of it when she's playing in there.
This rotating system did not happen overnight and there are still times when I tweak what I am doing.  One of the things I am considering is taking a photo of each toy and attaching it to the bin I place it in, so that A will know exactly where to put the toy when she's finished.  (How very Kindergarten teacher of me, huh?)
I will say, A's toys get much more use out of them and she is always excited when a new bin is introduced.  If all of the toys were out all of the time, I have a feeling she'd be overwhelmed and then become bored with everything. 
How do you keep your kids' toys organized?

Thursday, June 2, 2011

Rotating Toys Part Two: Labeling and Storing

The second part of rotating toys is labeling each bin.

1.  Print out large numbers and attach them to scrapbook paper. Tape the numbers on the inside wall of each bin.

2.  Take inventory of the bin and either handwrite (which I did originally) or type a list and tape it to the lid of the bin.


3.  Find a storage place.  I'm blessed that A has a large closet.  We use the right side of her closet floor to house all of the bins.  I am up to eight bins. (The toys were mostly gifts or purchased at secondhand stores) They stay in the closet until they are brought into rotation.  My sister borrows the bins every once in a while too, which was a major contributor to motivating my organization!
(After we've used a bin of toys, I put the toys back into the bin and put it on the bottom of the pile.  That way, I know which ones we've used and which ones have been waiting for a while.)
Tomorrow, Step Three:  Rotating the toys

Wednesday, June 1, 2011

Rotating Toys Part 1: Organizing toys into bins

When I was fresh out of college, I heard about a study that was done on school children.  It basically stated that when learning toys/manipulatives were in organized containers and when everything had a place, children were less disruptive and more on task than when things are disorganized and toys/manipulatives were all over the place.

This had a profound impact on how I taught and now how I am raising my daughter.  A has a few shelves that are her own that house her toys.  We have LOTS of toys, but only a few are out at a time.  This is how I go about keeping things organized.

1.  I took all of A's toys out of her room and sorted them into piles: stuffed animals, dolls, cloth books, stacking toys, shape sorters, etc.

2.  I lined up five Sterilite 30 qt. containers along the hallway.  (I chose these simply based on size)

3.  I would place one item from each pile into each bin.  If I didn't have enough sorters, for example, I'd just substitute something else I had.  I continued doing this until the bins were full.  If there were items that had pieces, I'd label a plastic baggie and put the pieces in that.


4.  I had a lot of dolls/stuffed animals, so after I had put one of each in the bins, I made a separate bin to house those things.  I also had a lot of puzzles as well as bigger toys that do not fit into the bins.  I made a separate bin for puzzles too.  The big toys are either stored in the closet or in a big tub behind A's glider.

Tomorrow:  Step two--labeling and storing bins